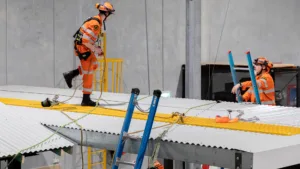
Roof anchor points are one of the most common fall protection systems found.
The most common type of fall protection system you are likely to come across are roof anchors. Anchors come in many shapes and sizes depending on their intended use and the roof construction, but they all work largely using the same principles.
When using a roof anchor system to protect from a fall, it is always better to be working with what is termed fall restraint technique. Fall restraint is when your lanyard and rope line is set at such a length a worker is unable to put themselves in a position where they may fall over an edge.
Of course, that is not always possible, so the next best alternative is to provide a fall arrest system. Fall arrest is where the system acts to catch a fall before the worker hits the ground or the level below. It is preferable to prevent or restrain the fall before it gets to this point.
So how does fall restraint technique work when using a roof anchor system?
Using a roof anchor system in fall restraint
In this example, we are going to use a simple, rectangular roof with a single portable ladder used to gain access. It looks a little like this.

On this roof are six (6) roof anchor points.

The anchor points are arranged in a way that they provide a fall protection system for the front half of the roof. This is called restricted access.

The first anchor point is positioned such that it can be reached by the worker from the ladder. They must not step up onto the roof without having first attached themselves (usually with a lanyard) to the fall protection system.
This first anchor point may also include a “first-man up cable” (or strop cable), which makes connecting to that anchor even easier for the user.
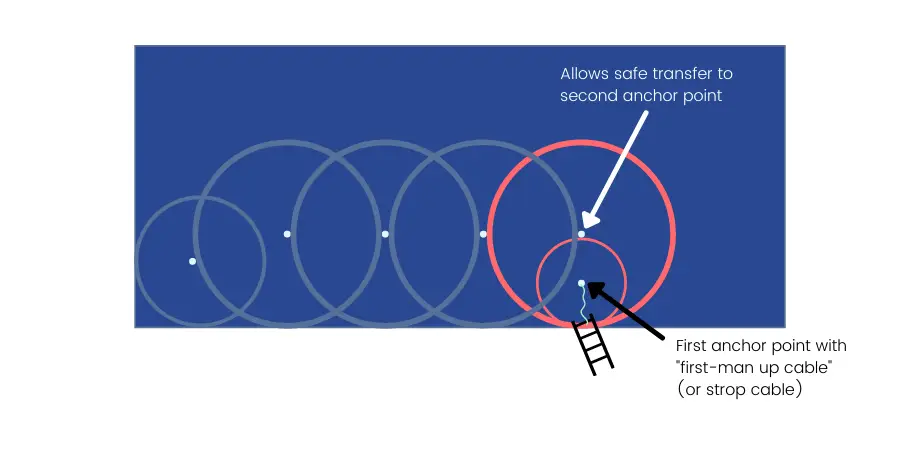
Once the worker is on the roof, they can transition to the second anchor. The anchors are placed carefully to ensure that during the transition, the distance between the anchors is not larger than the distance between the first anchor and the edge of the roof.
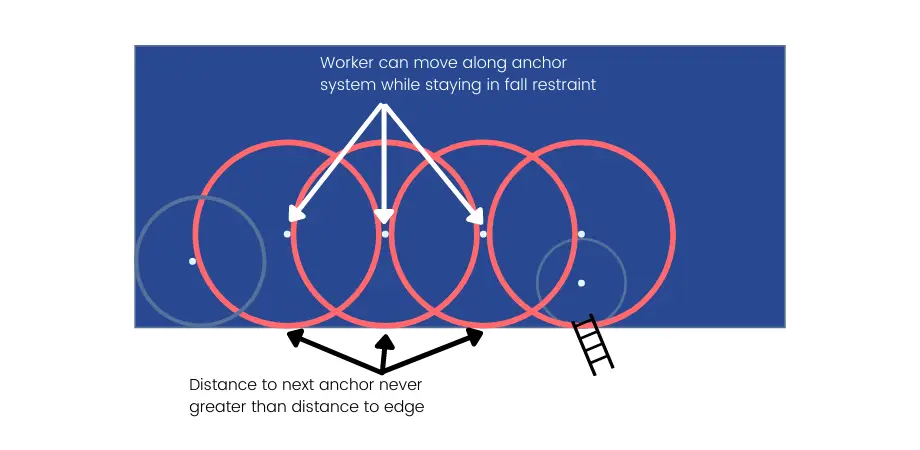
The remaining anchors are placed to ensure the worker can move along the roof, connecting to each anchor in turn, while remaining in fall restraint.
The distance to from one anchor to the next is never greater than the distance from the anchor to the edge of the roof. This means that if the worker were to slip, prior to connecting to the next anchor, they will not be able to fall over the edge of the roof.
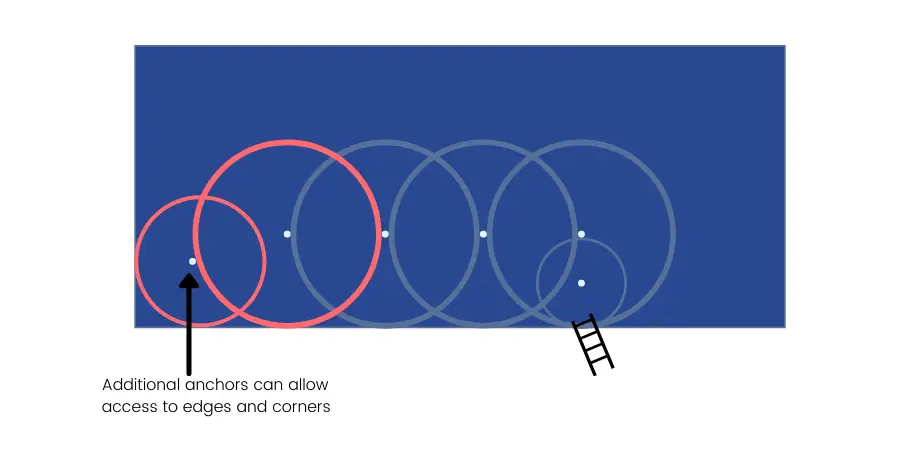
Depending on the layout of the roof, additional anchors may be placed to create safe access to corners or other areas of the roof. As with all the anchors, they are placed to ensure the distance between anchors never exceeds the distance to the edge of the roof, allowing the worker to use fall restraint technique the entire time.
Know the system limitations
It is important that workers understand the limits of a fall protection system.
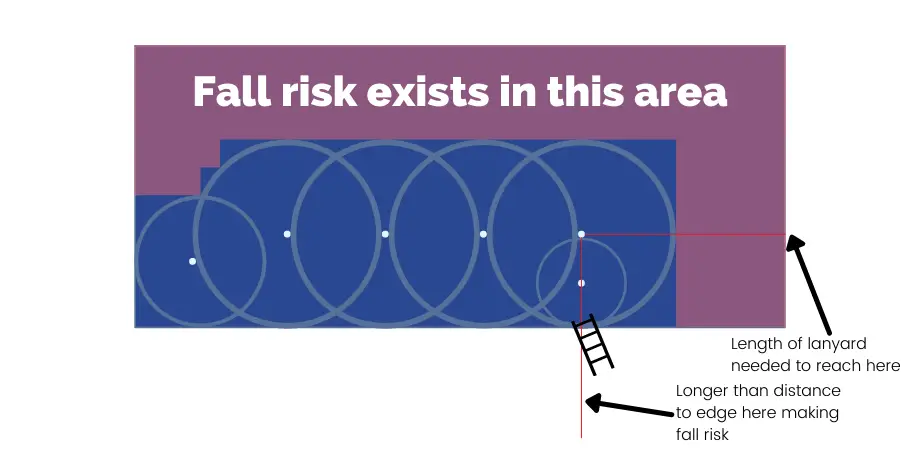
On this roof, the area shaded red should not be accessed using the anchor points present. Doing so would create a scenario where the length of rope needed to access the shaded area would exceed the distance from the anchor point to the edge of the roof.
Should the worker suffer a trip or slip, they could be in a position where they may fall off the edge of the roof, which introduces an increased risk of injury and their needing to be rescued.
Get the skills you need
Knowing how to identify the risks associated with working at heights is a critical skill that every tradesperson should have.
Work safely at heights training can provide the understanding and knowledge to identify the types of fall protection systems and equipment found on job sites, their benefits and limitations.
Height Safety Engineers offers height safety training at our training centres in Sydney and Dubbo. We can also tailor a height safety training course to your specific work or job site, delivering it where you are to help provide additional context.
Talk to our team on 1300 884 978 or email enquiries@heightsafety.net to start your journey towards protecting people with HSE.